Media and Art Techniques
The choice of media and techniques for artistic expression often depends on the preferences and interests of the individual and the goals of the therapy. For example, someone who is struggling with anxiety might find painting with calming, muted colors helpful. Someone who is working through feelings of anger might benefit from a more physical medium such as sculpting or dance. There is no prescribed correlation between therapeutic need and artistic medium. Each individual will settle into an approach that works best and may even try a combination of media.
The focus of art therapy across all media and techniques is on allowing the client to express themselves freely and explore their emotions and thoughts through the creative process. There should be no emphasis on producing a finished artwork that looks a certain way or meets any specific criteria. Before using a particular media or technique, begin by explaining to the individual what it is and how it can be used to explore emotions and express themselves through imagination.
Some common considerations when choosing tools and techniques in art therapy include:
Accessibility: The practitioner may consider the client’s physical abilities and any limitations they may have when selecting media and techniques. For example, they may choose materials that are easier for the client to hold or manipulate if they have physical disabilities.
Comfort level: The practitioner may also consider the client’s comfort level with different media and techniques. For example, they may encourage the use of familiar materials or techniques if the client feels more comfortable with them.
Goals for therapy: The practitioner may also consider the specific goals the client has for therapy when choosing media and techniques. For example, they may choose techniques that are more expressive or abstract if the client is working on exploring their emotions, or techniques that are more structured or realistic if the client is working on problem-solving skills.
In this section we will explore techniques used in painting, drawing, sculpture, and collage.
Common Techniques and Approaches
Some techniques and approaches to creating art in art therapy are common to several media. They are discussed here at the beginning of this section and can serve as a reference as you explore specific different media which follows.
Here’s a general guide on how to create an artwork, regardless of the medium:
- Choose a subject or theme: Decide what you want to create. It can be anything from a landscape, portrait, still life, or abstract composition.
- Sketch your composition: Once you have chosen your subject, sketch your composition on the canvas or paper. This will give you an idea of how the final piece will look.
- Gather your materials: Make sure you have all the necessary materials, such as paint, brushes, canvas, paper, pencils, charcoal, erasers, and any other materials specific to the medium you choose.
- Start with a basic composition: Begin by establishing the basic composition of your piece, using light lines or a thin, transparent layer of paint.
- Develop your composition: Develop your composition by adding more details and refining your lines. Pay attention to the relationships of the elements in your artwork and how they relate to each other.
- Experiment with different techniques: Experiment with different techniques, such as brushstrokes, blending, layering, and texturing, to create a variety of effects.
- Take breaks: Creating art can be intense, so take breaks to step back from your work and assess it from a distance. This will help you to see the piece with a fresh perspective and make any necessary changes.
- Allow the artwork to dry: If you are working with paint or other wet mediums, allow the artwork to dry completely before making any final adjustments.
Free form art: This involves giving the individual free reign to create whatever they wish, without any specific instructions or guidance. This can be a good way to allow your clients to express themselves freely and spontaneously. They are given the freedom to create whatever they like, using any materials and techniques they choose.
Here are some ways to facilitate free form art:
- Encourage the individual to work at their own pace.
- Provide materials and guidance on technique, but let the individual decide what materials they want to use and how they want to use them.
- Provide prompts or themes if needed, but allow the individual to create without any specific instructions or prompts if they prefer.
- During the process, check-in with the individual and ask them how they are feeling and what they are expressing through their art.
- Emphasize that the focus is on the process of creating.
Guided visualization: Guided visualization is a technique that combines art therapy with mindfulness and relaxation practices. It involves the art therapy practitioner leading the client through a guided meditation or visualization exercise, during which the client is encouraged to focus on their breath and let go of any distracting thoughts. Guided visualization can help the client access their inner thoughts and feelings, and can provide a way for them to express these thoughts and feelings through the creative process.
Here are some steps that can be used to facilitate a guided visualization session:
- Encourage the individual to get comfortable and to focus on their breath.
- Guide the individual through a series of mental images and sensations, using a calm and soothing tone of voice. This can include visualizing a peaceful place, such as a beach or a forest, and encouraging the individual to focus on the sights, sounds, and sensations of that place.
- Ask the individual to imagine themselves interacting with this peaceful place and to focus on the emotions and feelings that arise during this visualization.
- Encourage the individual to explore their feelings, emotions and thoughts through the process of visualization.
- After the visualization is complete, ask the individual to reflect on their experience and to share any thoughts or feelings that came up during the visualization.
- Encourage the individual to use their visualization as inspiration for creating a piece of art.
Symbolism: In art therapy, symbolism refers to the use of certain objects, images, or themes to represent something else, often on a deeper, emotional level. Symbolism can be a powerful tool in art therapy, as it allows the client to express their thoughts, feelings, and experiences in a way that is not always possible with words.
For example, a client might use a certain color to symbolize a particular emotion, such as red to represent anger or blue to represent sadness. They might also use certain shapes or forms to represent specific ideas or concepts, such as circles to represent unity or triangles to represent stability. Or incorporating symbols, such as animals or objects, into their painting to represent their thoughts, feelings, and experiences.
It’s important to note that the meanings of symbols can vary from person to person and can be influenced by cultural and personal experiences. The art therapy practitioner will take this into account when working with clients and helping them to explore the use of symbolism in their artwork.
Here are some steps that can be used to guide a client to use symbolism to create art:
- Encourage the individual to think about their emotions and experiences, and to consider what symbols or metaphors might represent them.
- Ask the individual to consider the colors, shapes, and textures that they use in their art, and to think about how these elements might relate to the symbols or metaphors that they are creating.
- After the artwork is complete, ask the individual to reflect on their process and to share any thoughts or feelings that came up during the process of creating.
- Encourage the individual to consider the meaning of the symbols or metaphors in their artwork and how they relate to their emotions and experiences.
Using color: As discussed before, color choice can have symbolic representation. Helping the client connect color with personal meaning can provide deep insights.
Here are some steps that can be used to guide a client to use color to create art:
- Encourage the individual to think about their emotions and experiences and to consider what colors might represent them.
- Encourage the individual to experiment with different colors and to use them in their artwork to explore their emotions and experiences.
- After the artwork is complete, ask the individual to reflect on their process and to share any thoughts or feelings that came up during the process of creating.
Process Art: The client begins with a blank surface and starts creating without any preconceived notions or goals, allowing the artwork to evolve organically. In process art, the art therapy practitioner may ask questions or provide prompts to help guide the client’s exploration, but ultimately the direction of the session is up to the client and what feels most meaningful to them. The art therapy practitioner may also offer feedback and reflections on the client’s artwork, but the focus is on the experience of creating the artwork and the insights and emotions that emerge during the process.
There is a nuanced difference in free form art and process art techniques. In free form art, the final product is open to interpretation and can be discussed in the context of the individual’s emotions and experiences. In process art, the focus is on the process of creating, and the emotions and thoughts that come up during the process, rather than the final product.
Here are some steps that can be used to guide a client to use the process art technique to create art:
- Encourage the individual to focus on the process of creating art, rather than the final product.
- Encourage the individual to experiment with different materials and techniques, and to use them in a spontaneous and intuitive way.
- Ask the individual to focus on their emotions and thoughts as they create, and to let the art take shape organically.
- Encourage the individual to let go of any preconceptions about what the art should look like and to trust the process.
- After the artwork is complete, ask the individual to reflect on their process and to share any thoughts or feelings that came up during the process of creating.
- Remind the individual that the goal is to explore emotions and thoughts through the process of creating and not to create a specific outcome or a perfect image.
Creating art to music: Creating art while listening to music in art therapy can be used to tap into the person’s emotions and unconscious mind, as the music can help to facilitate the expression of deeper feelings and thoughts. The music can also help to create a relaxing and meditative atmosphere, which can be beneficial to the therapeutic process.
Here are some steps that can be used to guide a client to create art to music:
- Introduce the concept of creating art to music as a therapeutic tool.
- Play a selection of music for the client to choose from.
- Allow the client to select a piece of music that resonates with them.
- Encourage the client to close their eyes and listen to the music while they work on their art piece.
- Encourage the client to allow their hand to move across the medium in a natural way.
- Ask open-ended questions to help the client explore their emotions and thoughts.
- Discuss the completed artwork and examine insights that may have manifested through the process.
There are many benefits to using music in art therapy. It can help individuals to express and process their emotions in a healthy and creative way, and it can also help to increase self-awareness and self-regulation. Additionally, it can be a fun and enjoyable activity that can help to reduce stress and improve overall well-being.
Creating art from imagination: This involves asking the individual to create something from their imagination, such as a character or a scene. This can be a good way to encourage creativity and self-expression.
- Discuss the concept of creating art from imagination with the client.
- Encourage the client to clear their mind and focus on their breath to help them enter a relaxed and receptive state.
- Provide a variety of art materials for the client to work with.
- Encourage the client to start by sketching out rough ideas for their art piece, using simple shapes and lines to build the basic composition.
- Encourage the client to allow their imagination to guide them as they add details, colors, and textures to their art piece.
- Provide support and encouragement as the client experiments with different techniques and materials.
- Ask open-ended questions to help the client explore their emotions and thoughts.
- Once the client has completed their art piece, encourage them to reflect on the process and any emotions or insights that emerged during the session.
Many of the techniques discussed above and below can be used in combination with one another to add more depth and texture to an artwork. Encourage experimentation to discover what feels comfortable and how techniques may be combined.
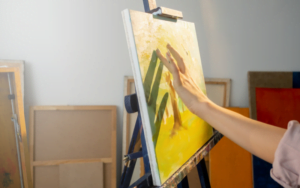
Painting
Painting is perhaps the most common medium in art therapy and is likely the first thing you think about when you think about art. Painting can involve creating images using a variety of paints such as watercolor, acrylic, or oil paints. Painting can be an effective tool for addressing a wide range of mental health issues, such as anxiety, depression, trauma, and substance abuse. It can also be used to promote relaxation and stress relief, enhance self-awareness, improve cognitive and motor skills, and enhance social skills and relationships. Art therapy using painting can be conducted in individual or group therapy settings and can be helpful for all ages and backgrounds.
For each medium below, start with these general guidelines on how to create an artwork using different types of paint:
- Use a good quality paint: Invest in good quality paint, as it will be more pigmented and have a better consistency.
- Use a palette: Mix your paint on a palette and keep it clean to avoid contamination of colors.
- Prepare your surface: If you are using a canvas, make sure it is primed and ready for painting. If you are using paper, choose a heavy weight paper that can handle the weight of the paint.
- Start with a thin, transparent layer: Begin by applying a thin, transparent layer of paint to your canvas or paper. This will help you to establish the overall tonal values of your composition.
- Experiment with different techniques: Experiment with different techniques, such as layering, glazing, and texturing, to create a variety of effects.
- Build up layers: Gradually build up the layers of paint, using thicker and more opaque paint as you progress. This will create depth and texture in your painting.
- Use a variety of brushstrokes: Experiment with different brushstrokes, such as short, choppy strokes, long sweeping strokes, and cross-hatching, to create a variety of textures and effects.
- Add details: Once the overall composition is established, add details and refine your painting.
- Take breaks: Painting can be intense, so take breaks to step back from your work and assess it from a distance. This will help you to see the painting with a fresh perspective and make any necessary changes.
- Allow the paint to dry: Before making any final adjustments, allow the paint to dry completely.
Media
Paints can come in a variety of forms. Here are a few:
Acrylic paint:
This paint is made from pigment suspended in acrylic polymer emulsion. It can be thinned with water and is easy to clean up. Acrylic paint dries quickly, which makes it a good option for clients who like to work quickly and impulsively. Acrylic paint can be used for a variety of techniques such as layering, blending, and impasto (thick, textured brushstrokes).
It can be used as a base layer for mixed media art projects, and can also be used to create a textured surface for other media to adhere to. It’s a suitable choice for large-scale mural painting, can be thinned with water to create a wash effect and can be used in conjunction with other types of paint. Acrylic paint can also be used as a medium to create a collage, to paint paper or other materials that will be used in the collage. Acrylic paint is more durable than tempera and it’s resistant to light and humidity, however, it’s important to note that acrylic paint is not as flexible as oil paint, and it can crack if applied too thickly.
Here are some guidelines on working with acrylic paint:
- Acrylic paint dries faster than oil or watercolor paint, so you will need to work quickly and be prepared to make decisions quickly.
- Acrylic paint can be mixed with water or mediums to create a variety of effects and to extend the paint. You can also mix different colors together to create new colors.
- Use a palette knife for mixing paint and for creating textured effects.
- Acrylic paint can be applied in multiple layers, which is useful for creating depth and texture.
- Experiment with different techniques, such as impasto, glazing, and layering, to create a variety of effects.
- Acrylic paint can be prone to smudging or flaking, so you may want to use a fixative spray to set the paint in place.
- Acrylic paint is water-soluble when wet, but once dry, it is difficult to remove. Clean your tools and work area before the paint dries to prevent any unwanted mess.
Oil paint:
This is a paint made from pigment suspended in oil. It can be thinned with solvents and has a longer drying time than acrylic paint. Oil paint is a slow-drying medium, which allows for more blending and layering. It can also be used to create a more traditional, realistic style of painting. Oil paint is also good for clients who want to work on a painting over an extended period of time.
Oil paint can be applied to a variety of surfaces, such as canvas or paper, using brushes, palette knives, or even fingers. Because it is a slow-drying medium, you can make changes to the artwork over time which allows greater flexibility for blending and layering of colors.
Here are some guidelines on working with oil paint:
- Thin your paint: Oil paint is thick and can be difficult to work with. To make it easier to apply, you can thin it with a solvent such as mineral spirits or turpentine.
Watercolor:
This is a transparent paint made from pigment suspended in water. It can be thinned with water. Watercolor is good for creating a delicate, ethereal effect. It can be used for a variety of techniques such as wet-on-wet and layering.
It can be a useful alternative to oil paint as it is more portable and easy to clean. Watercolor paint can be applied to paper using a brush and water, and can create a wide range of effects depending on the amount of water used and the layering of colors
Here are some guidelines for working with water colors:
- Experiment with different techniques: Try different techniques, such as wet-on-wet, wet-on-dry, and layering, to create a variety of effects.
- Use a limited color palette: Watercolors can be transparent, so it is a good idea to use a limited color palette to create a cohesive composition.
- Paint from light to dark: It is best to paint from light to dark to create depth and contrast in the final piece. It is difficult to lighten a dark color.
- Use a fixative: Watercolors can be prone to smudging, so you may want to use a fixative spray to set the paint in place.
Gouache:
This is an opaque paint made from pigment suspended in water and a binding agent. It is similar to watercolor, in that it is water-soluble, but it is more matte and opaque and has a thicker consistency, which allows for more vibrant and bold colors. It can also be used to create a more realistic style of painting.
Gouache is a fast drying medium that allows for the client to make quicker decisions in their artworks because you don’t have to wait long to add layers. It can be applied to a variety of surfaces, such as paper or canvas. It is also a more opaque medium than watercolor, which can be useful for clients who want to create more detailed and defined artworks.
Here are some guidelines for working with gouache:
- Experiment with different techniques: Try techniques, such as layering, glazing, and texturing, to create a variety of effects.
- Paint in layers: Gouache is opaque, so you can paint in layers to create depth and texture.
- Use a fixative: Gouache can be prone to smudging, so you may want to use a fixative spray to set the paint in place.
Tempera:
This is a paint made from pigment suspended in a water-soluble binder, such as egg yolk. It has a matte finish and dries quickly. It is a popular choice for art therapy with children because it is non-toxic and easy to clean up. It can be used for a variety of techniques such as layering, blending, and impasto. It is good for clients who want to work quickly and impulsively because you don’t have to wait long to add layers.
Tempera paint can also be used as a base layer for mixed media art projects, large-scale mural painting and collage. However, it’s important to note that tempera paint is not as durable as oil paint or acrylic paint and it can be affected by light and humidity, it’s best used for temporary or indoor projects.
Here are some guidelines for working with tempera:
- Mix the paint: Tempera paint can be thick, so mix the paint with water to achieve the desired consistency.
- Paint in thin layers: Tempera dries quickly, so it is best to paint in thin layers to prevent cracking.
- Use a fixative: Tempera can be prone to smudging, so you may want to use a fixative spray to set the paint in place.
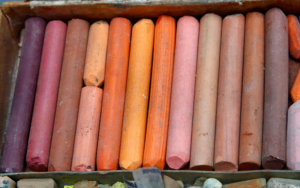
Pastel:
This is a dry paint made from pigment mixed with a binder, such as chalk or clay. It comes in stick form and can be used to create a soft, delicate effect. They can also be used for a variety of techniques such as blending, layering, and impasto. Pastels can be used on a variety of surfaces such as paper, board, or canvas.
Pastel paint is an opaque medium and it is good for creating bold and vibrant colors. It is also good for creating a sense of depth and texture in a piece of art. Pastel paint can be blended and layered to create a wide range of effects, it can be applied dry or with a fixative to create different textures. It’s easy to control the intensity of the color and can be blended with other mediums. Pastel paint can be a good alternative for artists who prefer a dry medium and want to create more texture in their paintings.
Pastel paintings and drawings are particularly susceptible to smudging and fading because the pigments are not as firmly bound to the surface as they are in other types of paints. Fixative can help preserve the integrity of these drawings by keeping the marks in place, and preventing smudging.
Here are some guidelines for working with Pastel:
- Use a variety of pastels: Use a variety of pastels to create different effects. For example, hard pastels can be used for fine details, while soft pastels can be used for larger areas of color.
- Paint in layers: Pastels can be layered to create depth and texture.
- Use fixative spray: Pastels can be prone to smudging, so you may want to use a fixative spray to set the pastel in place.
Techniques
Paint techniques include the following:
Brushwork:

This technique involves using a brush to apply paint to the canvas or surface. There are many different types of brushes, such as round, flat, fan, and filbert, each with their own unique characteristics. Brushwork can be used to create a wide range of effects, from fine details to bold, expressive strokes.
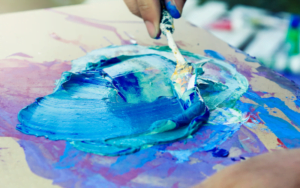
Palette knife:
 A palette knife can be used to apply paint in a thick, impasto style. The knife can be used to create textured surfaces, and to mix and blend colors on the palette.
Finger painting:
Finger painting is a technique where the artist applies paint to the canvas or surface using their fingers, rather than a brush. This technique can create a more organic and spontaneous look.
Splattering:
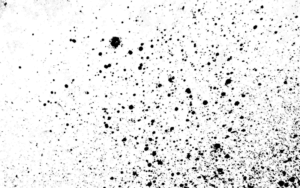
This technique involves flicking or splashing paint onto the canvas to create a random, textured effect. This can be done using a brush, palette knife, or even toothbrushes.
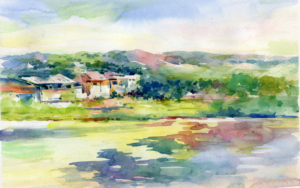
Wet-on-wet:
Wet-on-wet technique is a method of painting in which the paint is applied to a wet surface. This allows the colors to blend and mix together, creating a softer and more blended effect. This technique is often used for landscapes and other types of paintings where blending and softness are desired. Wet-on-wet is best suited for watercolor and gouache. It can be used with oil and acrylic painting but is a bit more challenging because these mediums can form a “skin” making it difficult to blend.
Wet-on-dry:
This is a method of painting in which the paint is applied to a dry surface. This creates more defined brushstrokes and a more textured effect. This technique is often used for portraits and other types of paintings where detail and texture are desired. Works well with oils and acrylics.
Glazing:
Glazing is a technique where a thin, transparent layer of paint is applied over an existing layer. This can be used to create depth and luminosity, and to change the color of an existing layer.
Impressionism:

Impressionism is a style of painting that emphasizes the use of small, visible brushstrokes, to capture the impression of light and movement. This technique can be used to create a sense of depth and atmosphere.
Abstract expressionism:

This is a style of painting that emphasizes the spontaneous, automatic or subconscious creation of a composition. It usually involves the use of large canvases, gestural brushstrokes (conveys movement, energy, and emotion), and the application of paint in a highly intuitive and physical manner.
Layering:
Different colors are applied on top of one another to create depth, texture and can be used to create the illusion of shadows or to add texture to an object.
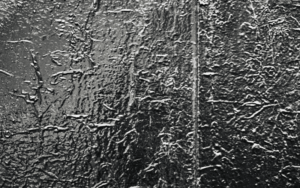
Impasto:
The artist applies thick layers of paint to the canvas, often using a palette knife or other tool to create texture and depth. The paint is layered so thickly that the brushstrokes or palette knife marks are visible in the finished piece. This technique is often used to create a sense of movement or to add drama to a painting.
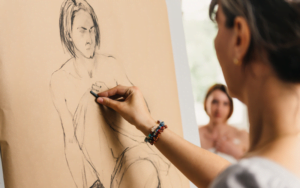
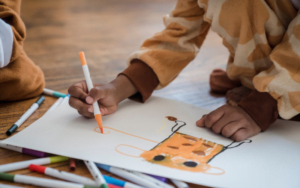
Drawing
 Drawing is a common medium used in art therapy, as it can be far more accessible than other mediums since all it requires is a simple marking tool and piece of paper.
There are many different approaches to using drawing in art therapy, and the specific techniques and approaches used may depend on the goals and needs of the individual or group.
For each medium below, start with these general guidelines on how to create an artwork by drawing:
- Experiment with different drawing instruments such as pencils, charcoal, pens and markers.
- Start by drawing basic shapes such as circles, squares, and triangles.
- Once the individual is comfortable with basic shapes, progress to more detailed drawings, such as still lifes or landscapes.
- Experiment with different techniques, such as hatching, cross-hatching, and stippling.(see below for techniques)
- Encourage reflection: Encourage the individual to reflect on their drawings and the emotions they may have experienced while creating them.
Media
There are many different media that can be used in drawing, including:
Pencil:
There are many different types of pencils available, each with their own unique characteristics. For example, graphite pencils range from 6B (softest) to 6H (hardest). Softer pencils, such as 2B or 4B, will create darker, more intense lines, while harder pencils, such as 4H or 6H, will create lighter, more delicate lines.
Here are some guidelines on how to create an artwork by drawing with pencils:
- Use a variety of pencils to create different effects. For example, use a hard pencil to create light lines and details, and a soft pencil to create dark areas and shadows.
- Use different pressures when drawing. Light pressure will create a light line, while heavy pressure will create a darker line.
- Experiment with different strokes to create different textures and effects. For example, use short, choppy strokes to create a rough texture, or long, sweeping strokes to create a smooth texture.
- Use an eraser to correct mistakes or to create highlights and texture.
Charcoal:
There are several types of charcoal available, each with their own unique characteristics. Compressed charcoal is a type of charcoal that is compressed into a stick form and can be sharpened to a fine point for detailed work or used in broad strokes for shading. Vine charcoal is made from burned willow branches or other types of wood and has a delicate texture, ideal for sketching and creating light lines. Charcoal pencils are a type of charcoal encased in a wooden pencil form, easy to handle and control and can be sharpened like a regular pencil. Carbon charcoal is a type of charcoal made from burning wood or other organic materials and it is intense and ideal for creating dark lines and shadows. White charcoal is made from burning willow branches and other woods in a kiln at very high temperatures, it is a white color charcoal which can be used for highlights and details on dark paper. Charcoal works best with thick paper or drawing paper.
Here are some guidelines on how to create an artwork by drawing with charcoal:
- Use a variety of charcoal types and experiment with light and dark lines, shading and texture.
- Charcoal is a messy medium and can smudge easily. To prevent this, use a fixative spray to set the charcoal in place.
- Use a blending tool, such as erasers, a blending stump or your finger, to blend the charcoal and create smooth transitions.
- Gradually build up the layers of charcoal, using a variety of charcoal sticks to create depth and texture in your drawing.
Note some difference between pencil and charcoal:
- Materials: Charcoal is made from compressed charcoal dust and is available in sticks or pencil form. Pencils, on the other hand, are made from graphite encased in wood.
- Value range: Charcoal has a wider value range, meaning it can create a greater range of tones from light to dark. Pencils, on the other hand, have a more limited value range, and are better suited for creating subtle gradations of tone.
- Textures: Charcoal can create a wide range of textures, from fine lines to smudgy, blurred areas. Pencils, on the other hand, are better suited for creating fine, detailed lines.
- Erasing: Charcoal can be erased by lightly rubbing with a kneaded eraser, but it can leave smudges and it’s difficult to get rid of all the charcoal. Pencils can be erased easily with a regular eraser, but it can’t be blended again after erasing.
- Messiness: Charcoal can be messy and can smear easily, so it’s not a good idea to use it on clothing or on furniture. Pencils, on the other hand, are relatively clean and easy to use.
- Surface: Charcoal is best used on paper that is thick enough to hold the charcoal and not get smudged. Pencils, on the other hand, can be used on a variety of surfaces.
- Charcoal is a medium that is best suited for creating bold, expressive drawings with a wide range of values and textures, while pencils are better suited for creating fine, detailed drawings with subtle gradations of tone.
Pastel:
See Painting section above for details about Pastels
Note some differences in using pastels for painting or drawing:
- Application: Pastels can be layered on top of each other to create depth and luminosity, which is a characteristic feature of pastel paintings. Pastel drawings have fewer layers, and the medium is applied more precisely, with more control and accurate representations.
- Finish: Pastel paintings have a softer, more ethereal finish than oil or acrylic paintings, because the particles of pigments are loose on the surface. Pastel drawings tend to have a more finished look, as the medium is applied more precisely.
- Durability: Pastel paintings are more delicate than oil or acrylic paintings, as they are more susceptible to smudging, fading or wear over time. Pastel drawings are less delicate, as the medium is applied in a more controlled and precise manner.
- In summary, pastels are a versatile medium that can be used for both painting and drawing, with different techniques and effects. While pastel paintings are characterized by layers and luminosity, Pastel drawings have a more finished look and are more precise.
Ink:
This is a liquid paint made from pigment suspended in a liquid, such as water or oil. Ink can be used in various instruments including pens and markers.
Ink can be a useful medium for art therapy because of its versatility and with the ability to create bold, expressive lines. It can be used in a variety of techniques, such as calligraphy or drawing. The repetitive motions of calligraphy or drawing can be meditative and calming.
Here are some guidelines for drawing with Ink:
- Try different pens, markers, and other ink instruments and experiment with different line widths and textures. Ink can be a challenging medium because of its flow, rapid drying and permanence.
- When drawing with ink, it’s best to start with light lines and build up to darker lines. This allows for more control and makes it easier to correct mistakes. You can make ink darker but not lighter.
- On the other hand, ink is a transparent medium, so the first lines may show through to some extent. Depending on what you are creating and the type and color of surface, it may be best to work from dark to light. The benefit is that using this transparency and dark/light effects can create depth and contrast; so, you should experiment.
- Before drawing with ink, you may find it useful to make a pencil sketch of your drawing. This will give you a guide to follow and will make it easier to correct mistakes before committing to ink.
- Rulers and compasses are useful tools when drawing with ink as they allow you to create straight lines and circles with precision.
- Using a limited palette of ink colors can help you focus on the composition and the overall look of your piece.
- Be mindful of how the ink flows from the instrument and how it reacts to the surface you are working on.
Techniques
Some common drawing techniques and approaches used in art therapy include:
Pencil Techniques:
Hatching:
Hatching is a technique where parallel lines are drawn closely together to create a sense of depth and texture. It can be used to create the illusion of shadows or to add texture to an object.
Cross-hatching:
Cross-hatching is a technique where two sets of parallel lines are drawn at right angles to each other. This technique can be used to create a sense of depth and texture, and can also be used to create the illusion of shadows or to add texture to an object.
Stippling:
 Stippling is a technique where small dots are used to create texture or to create the illusion of depth. It’s often used to create the illusion of texture on a smooth surface.
Charcoal Techniques:
Smudging:
Smudging is a technique where the charcoal is spread out or blended by using the fingers or a blending tool such as a blending stick or a paper stump. This technique can be used to soften lines and create a sense of depth and texture.
Blending:
Blending is a technique where two or more colors of charcoal are blended together to create a new color. This technique can be used to create a sense of depth and texture, and can also be used to create the illusion of shadows or to add texture to an object.
Erasing:
Erasing is a technique where charcoal is removed from a certain area by using an eraser, such as a kneaded eraser. This technique can be used to create highlights or to correct mistakes. Keep in mind that erasing charcoal can be difficult and it may leave smudges.
Scumbling:
Scumbling can be done with the side of the charcoal stick or with the charcoal in powdered form.
Pastel Techniques:
Blending and Smudging:
as detailed above can both be used with pastels.
Layering:
Different colors of pastels are applied on top of one another to create depth, texture and luminosity that can be used to create the illusion of shadows or to add texture to an object.
Scumbling:
The pastel stick is lightly dragged over the surface, creating a textured and broken effect. This technique is often used to create the illusion of texture or to add depth to a painting or drawing.
Scumbling is usually done with the side of the pastel stick and the pressure is kept light in order to create a thin and transparent layer of pastel. It can also be done with a blending tool like a finger, a blending stick or a paper stump. The technique can be repeated to build up the texture and color.
Scumbling can be used to create a wide range of effects, from soft, ethereal backgrounds to more textured and impasto-like areas. It can be used to create a sense of depth and distance, or to add interest and movement to a painting or drawing. Scumbling can be combined with other techniques such as blending and layering, to achieve a wide range of effects and styles.
Ink Techniques:
Line drawing:
This technique uses a pen or brush to create fine lines to create a drawing.
Wash:
This technique uses a brush and ink to create a range of tones and values by varying the amount of ink and water used.
Scribbling:
This is a technique of drawing with a pencil or pen in which the artist repeatedly makes short, random strokes to create a textured effect.
Cross-hatching:
This is a method of shading by drawing closely spaced parallel lines that cross each other at different angles.
Stippling:
This is a technique of drawing by applying small dots of ink to create a range of tones.
Sumi-e:
This is a traditional Chinese and Japanese ink painting technique that uses simple brushstrokes to create a painting.
Sculpture
Sculpture can be a powerful tool in art therapy, helping clients to express themselves, explore their feelings and emotions, work through challenges, and find relaxation and stress-relief through the creative process.
In general, the practitioner may guide the client through the process of creating a sculpture, providing support and encouragement as needed. The practitioner may also use techniques such as guided visualization or affirmations to help the client focus their mind and tap into their creativity.
After the sculpture is complete, the practitioner may help the client to explore the meaning and significance of the piece. This may involve discussing the process of creating the sculpture, the materials used, and any feelings or thoughts that came up during the process. The practitioner may also use the sculpture as a way to explore specific themes or issues in the client’s life.
For each medium below, start with these general guidelines on how to create sculpture artwork:
- Creating an armature: Once you have a design you are happy with, the next step is to create an armature, or internal framework, to support the sculpture as it is built up. This is typically made of wire or metal rods and is shaped to match the basic form of the sculpture.
- Building up the sculpture: The sculpture is then built up over the armature using clay or another material, and details are added to complete the design.
- The sculpture is built up in layers, using modeling tools such as knives, ribbon tools, loop tools, and spatulas with each layer shaped and sculpted to match the final design.
- Hardening the sculpture: Once the sculpture is complete, it can be fired or cast in a mold to harden it. This step is important for sculptures that will be on display, as it ensures that the sculpture will maintain its shape over time.
Media
The process of creating a sculpture will vary depending on the materials and techniques used. Some media such as stone, metal and glass require hard skills in manipulating the media that must be learned prior to getting into the creative process.
Some of the common media used in art therapy sculpture include:
Clay:
 Working with clay is a popular form of sculpture in art therapy, as it is a versatile and forgiving medium that allows for a wide range of expression.
Using clay as a medium in sculpture allows for a wide range of possibilities in terms of form, texture, and expression. Artists can create sculptures by shaping, molding, and carving the clay. Some sculptors use an armature, a framework, to build upon and give support to the clay sculpture, especially if the sculpture is of large size or if the artist wants to create more complex and articulated forms.
Once the sculpture is complete, it can be fired in a kiln to harden and preserve the work. The firing process can also change the color of the clay, depending on the type of clay and the temperature at which it is fired.
Here are some guidelines on how to create a clay sculpture:
- Preparing the clay: The clay must be prepared before it can be used for sculpture. This typically involves wedging the clay (a form of kneading) to remove any air bubbles and to make it more pliable.
- Sketching and planning: Before starting to work with the clay, the artist will often make sketches and plans to help them visualize the finished piece.
- Modeling: The artist will then begin to shape the clay using their hands, tools, or a combination of both. Depending on the technique used, the clay may be shaped on a pottery wheel or built up using coils of clay, or molded on an armature. Artists can use different tools to create textures and details on the surface of the sculpture.
- Drying: Once the sculpture is complete, it will need to dry before it can be fired. The drying process can take anywhere from a few days to several weeks, depending on the size and complexity of the piece.
- Firing: Once the sculpture is dry, it will be fired in a kiln at high temperatures. The type of clay and the temperature at which it is fired will determine the final color and strength of the piece.
- Finishing: After firing, the sculpture may be sanded, polished, or glazed to create a smoother surface and enhance the colors. Some sculptures may require multiple firings with glazes or other surface treatments.
- Kilns may be accessed in local pottery studios and other community based organizations which will provide this service.
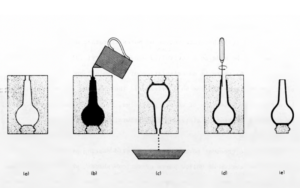
Plaster:
A white, powdery material that hardens when mixed with water. It is often used to create casts or molds. Plaster is a popular medium for sculpture because it is easy to work with and can be used to create a wide range of forms and textures. It is a versatile material that can be used for both small and large-scale sculptures, and can be painted or finished in a variety of ways.
Here are some guidelines on how to create a plaster sculpture:
- Modeling: The artist will create a model of their sculpture, typically using clay or wax.
- Mold-making: A mold is made of the model, typically using a plaster or silicone rubber. The mold is used to create multiple copies of the sculpture.
- Casting: Plaster is mixed with water and poured into the mold. The plaster is then left to set and harden, usually for a few hours. Once the plaster is set, the mold is removed, revealing the sculpture.
- Finishing: The sculpture may then be sanded, painted, or finished in a variety of ways to create the desired surface. Some sculptures are left in their natural white color and others can be painted or patinated.
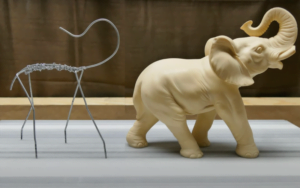
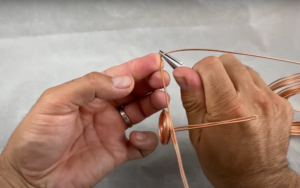
Wire:
 Wire is a common, accessible medium used in sculpture due to its flexibility and malleability. It can be bent, twisted, and shaped into a variety of forms and is often used to create delicate and intricate sculptures. Wire sculpture can be made using a variety of materials, including copper, steel, and aluminum, and can be finished with a variety of techniques, such as painting, patination, or electroplating. Some artists use wire to create representational sculptures, while others use it to create abstract or conceptual pieces. Wire sculptures can range in size from small, delicate pieces to large, monumental works.
Here are some guidelines on how to create a wire sculpture:
- Gather materials: You will need wire (copper, aluminum, or steel), a couple pliers, wire cutters, and a stable surface to work on.
- Plan your design: Before you start sculpting, sketch out a rough idea of what you want your sculpture to look like. This will give you a general idea of the shape and size of the sculpture.
- Bend the wire: Use the pliers to bend the wire into the general shape of your sculpture. This will be the foundation for your sculpture.
- Add details: Use the pliers to add details and texture to the sculpture. This can include shaping the wire into specific forms, curling it, or creating a specific pattern.
- Cut the wire: Use the wire cutters to make precise cuts and shapes. This can include cutting off excess wire, or trimming specific sections to create a more detailed or precise look.
- Assemble: Assemble different pieces of the sculpture using pliers to twist, bend, and shape it into the desired form.
- Final touches: Once you are satisfied with the overall shape and form of your sculpture, you can add any final touches or details to make it more polished and complete
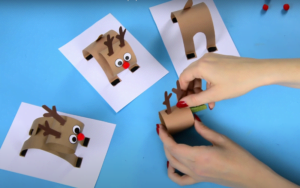
Paper:
 A paper sculpture is a work of art created by shaping and assembling paper into a desired form. The paper can be cut, folded, and glued together to create different shapes, textures, and effects. There are a variety of different types of paper that can be used for paper sculptures, including construction paper, cardstock, origami paper, and others. The sculpture can be decorated with paint, markers, or other decorative items.
Paper sculptures can vary in size and complexity, from small and simple to large and intricate. They can be displayed on a stand or in a frame, depending on the size and style of the sculpture.
Here are some guidelines on how to create a paper sculpture:
- Gather materials: You will need paper (such as construction paper, cardstock, or origami paper), scissors, glue, and any other materials you want to use for your sculpture (such as paint, markers, or other decorative items).
- Plan your design: Before you start sculpting, sketch out a rough idea of what you want your sculpture to look like. This will give you a general idea of the shape and size of the sculpture.
- Cut the paper: Use the scissors to cut the paper into the shapes and sizes that you will use to build your sculpture. You can use a variety of different cutting techniques, such as straight cuts, curved cuts, or fringes, to create different effects.
- Assemble the sculpture: Use glue to assemble the cut paper into the desired shape of your sculpture. You can also use other techniques such as folding, rolling, or layering the paper to create different effects.
- Add details: Once the basic shape of your sculpture is in place, you can use paint, markers, or other decorative items to add details and texture to your sculpture.
- Allow to dry: Allow the glue to dry completely before handling your sculpture.
- Final touches: Once the sculpture is dry and stable, you can add any final touches or details to make it more polished and complete.
Techniques
Some common sculpture techniques and approaches used in art therapy include:
Clay Techniques:
Hand building
Using your hands and simple tools to shape and mold the clay into the desired form.
“Coil and scrape” or “pinching”:
This involves building the sculpture by adding coils of clay, one at a time, and then smoothing the surface with a tool. This technique is used to create a variety of forms, such as bowls, jars and vases, as well as figures, animals and even abstract forms.
Slab building:
Cutting the clay into flat slabs and then assembling them to create the desired form.
Molding:
Using a mold of the desired form and then casting the clay into the mold.
Modeling:
Modeling is used to shape and form a material into a three-dimensional object or structure. It is typically done using a soft, pliable material such as clay or wax.
Impasto:
As detailed in the Paint techniques section, Impasto involves layering. In sculpture, impasto can be achieved by layering materials such as clay or plaster to create a textured surface.
Casting:
Making a mold of an object and then casting it in a different material, such as plaster, resin.
Armature:
Using wire as a base structure and forming clay or other malleable materials around the form to create a sculpture.
Plaster Techniques:
See above for plaster techniques which are common with clay including molding, modeling, impasto, casting and impasto .
Slip casting:
Pouring liquid plaster into a plaster mold, allowing it to set, and then removing the sculpture from the mold.
Wire Techniques:
Bend and twist
 Using pliers to bend and twist the wire into the desired shape.
Weaving: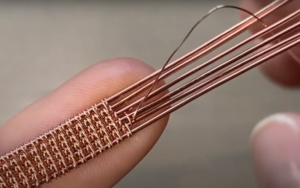
Weaving the wire together to create a more complex and detailed structure.
Wrapping:
Wrapping the wire around a form or structure to create the desired shape.
Knotting:
Tying knots in the wire to create a more organic, fluid shape.
Soldering: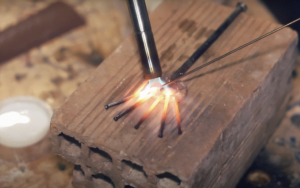
Using a soldering iron to fuse pieces of wire together to create a stronger structure.
Beading:
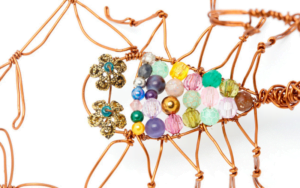
Adding beads or other decorative elements to the wire sculpture
Paper Techniques:
Papier-mâché:
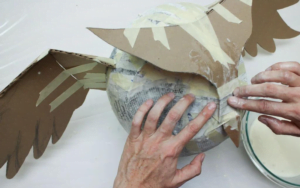
A technique where paper is coated in a mixture of glue and water to create a strong and durable sculpture.
Cut-out:
Using scissors or a craft knife to cut out a design from paper and then layering or shaping the cut pieces to create a 3-dimensional sculpture.
Quilling:
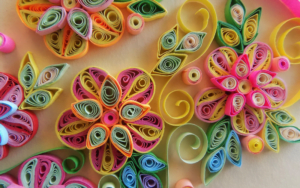
Rolling thin strips of paper into different shapes, and then gluing them together to create a sculpture.
Book sculpture:
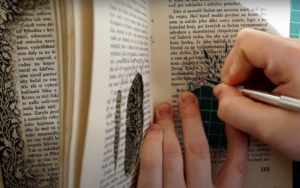
Using the pages of a book to create a sculpture, often by folding, cutting or tearing the pages.
Origami:
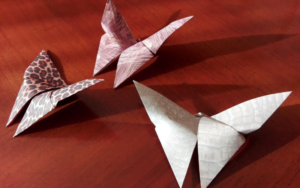
The traditional Japanese art of paper folding, which can be used to create a wide range of forms and shapes.
Kirigami:
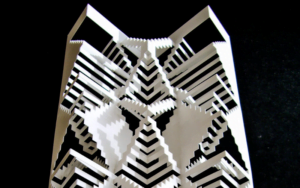
Similar to origami, but also involves cutting the paper.
Collage
Collage is a method of creating an artwork by combining different materials, such as paper, fabric, and photographs, onto a surface, such as canvas or paper. Experiment with different media and materials to tell your story. Collage allows for the creation of complex and layered compositions, as multiple materials can be used to create depth and texture.
Collage can be created by cutting and tearing materials into different shapes and sizes and arranging them onto the surface. Adhesives, such as glue or tape, can be used to hold the materials in place. It can be a spontaneous and intuitive process, and lends itself well to therapeutic artistic expression. It can be a fun and expressive way to create art and can be an effective way to explore ideas and emotions.
Here are some general guidelines on how to create a collage artwork:
- Gather materials such as scissors, glue, and various items you plan to include in the composition.
- Create a composition by arranging and rearranging the materials on a surface until you are satisfied with the overall design.
- Once you have a composition you like, begin gluing the materials down onto the surface.
- You can also use different techniques like layering, overlapping, and creating texture to add depth and interest to your collage.
- Collage art is a very creative medium with no specific rules. You can experiment with different materials and techniques to create unique and personal art. And you can combine media in any manner you feel like to create powerfully expressive pieces.
Media
There is literally no limit on what materials can be used in a collage. Some common materials include:
Paper: The process of cutting, arranging, and gluing paper can help individuals express themselves and process emotions. Use a variety of paper materials such as newspapers, magazine clippings, construction paper, tissue paper, and book pages. Such paper is generally flat, thin, and can be easily cut into different shapes and sizes. It’s often used to create a collage that is visually interesting and textured by layering, overlapping, and creating texture. Paper can also come in different weight, color and pattern of papers, that can be used to create a collage with an interesting visual effect.
As the individual cuts and arranges the paper, encourage them to allow their emotions to guide their choices. The act of cutting and arranging paper can be a form of releasing emotions, and the final product can represent their current emotional state.
Use other materials such as paint, markers, or other collage elements to enhance your paper collage. Experiment with different types of paper, such as glossy, matte, or textured, to add visual interest and depth to your collage. Incorporate found objects or other materials, such as yarn, ribbon, or fabric, into your collage to add texture and depth.
Here are some guidelines on how to create a paper collage:
- Gather a variety of paper materials such as newspaper, magazine clippings, construction paper, tissue paper, and book pages.
- Select the papers you want and begin cutting them into different shapes and sizes. You can use scissors, a craft knife, or a paper cutter.
- Once you have a variety of cut paper pieces, start arranging them on your surface to create a composition. Experiment with different arrangements until you are satisfied with the overall design.
- Once you have a composition you like, begin gluing the paper pieces down onto the surface. You can use a glue stick, white glue, or another type of adhesive.
- Create visual interest and texture by using different weight, color, pattern and content of papers and by using techniques like layering, and overlapping.
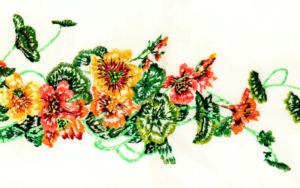
Fabric: Using fabric in a collage can provide a different tactile experience than paper, and can also hold personal meaning for the individual. Fabric, such as scraps of clothing, old linens, or other textiles, is generally thicker and more textured than paper. It can be cut into different shapes, but it may be more difficult to cut than paper. Fabric collages can have a softer, more organic feel than paper collages. Fabric can also come in different weight, color and pattern of fabrics, that can be used to create a collage with an interesting visual effect.
Here are some guidelines on how to create a fabric collage:
- The process is almost identical to creating a paper collage.
- You may need to use more substantial cutting tools such as special purpose fabric scissors.
- Experiment with different types of fabric, such as cotton, silk, or burlap, to add visual interest and depth to your collage.
- Cut fabric into different geometric shapes, layer different textures and weights and fold, drape and scrunch fabric to create visual interest and a sense of movement, dimension and depth.
- Try using a limited color palette or different shades and hues of a single color to create a cohesive and harmonious composition.
- Incorporate found objects or other materials, such as yarn, ribbon, or paper, into your collage to add visual interest and depth.
- Use fabric with patterns, prints, or embroidery to add visual interest and depth to your collage.
Photos: A photo collage consists of multiple photographs arranged together in a creative and visually interesting way. It’s a creative medium that allows you to play with different elements to transmit a message in a unique way. Photos can be personal or found, and can be used to create a collage that has personal and emotional content that can be used to tell a visual story, to capture memories or express emotions about people and things that have special meaning for the person creating the collage.
Here are some guidelines on how to create a photo collage:
- The process is almost identical to creating a paper collage and in some ways closer than other media.
- Consider the story you would like to tell and arrange and sequence the layout to create the narrative. This could include:
- Chronology: Date and time
- Geography: Places, cities, countries
- Events: Vacations, birthdays…
- People: a person or several people
- Things: Cars, homes, pets…
- Some combination
- Alternatively, layout and flow can also be totally random and eclectic.
Objects: Small objects such as shells, buttons, coins, or even miniature figurines can be integrated into the artwork.
Here are a few tips for creating a successful collage of small objects:
- Choose a theme: Select a theme for your collage that will tie all of the objects together. This can be a color scheme, a subject matter, or a style.
- Gather all of the small objects that you want to include in your collage.
- Add a background: There will likely be spaces in between objects so consider adding a background on the surface of your collage. This could be a solid color, patterned paper, photograph or other materials including fabric or even sand.
- Plan the layout: Plan out the layout of your collage. You can use graph paper to create a rough sketch of the composition.
- Use different textures and sizes: To create visual interest, try to use a variety of textures and sizes in your collage. This can be achieved by mixing different types of materials such as glass, metal, wood, and fabric, or by using different sizes of objects.
- Create a focal point: Decide on a focal point for your collage and arrange the objects around it. This could be the largest or most unique object in your collection.
- Use a good glue: Use a glue that is specifically designed for the material of the object. This will ensure that the objects stay securely in place and prevent damage.
- Use different techniques such as tearing, fraying, or distressing fabric to add texture and depth to your collage.
Techniques:
Some common techniques that can be used when creating a collage include:
Cut and paste: This is the most basic technique for creating a collage. It involves cutting out images or other materials and then gluing them onto a background to create a new composition.
Torn paper: This technique involves tearing the edges of the paper or other materials to create a more organic look.
Fray and unravel: Intentionally fray the edges of fabric for a shabby-chic or distressed look. Or, leave the edges of the fabric raw, and let them fray naturally over time. This can create texture and dimension for an interesting, organic look in the collage.
Assemblage: A three-dimensional work is created by combining and attaching found objects or materials. These objects can be almost anything, including everyday items such as bottle caps, keys, or buttons, as well as more unusual materials such as old toys, machine parts, or even discarded furniture. It is also a way to recycle and reuse materials that might otherwise be discarded, giving them new life and purpose.
Summary of Key Points
- Art therapy can be done through a variety of mediums, such as painting, drawing, sculpture, and collage. Each medium offers a variety of media and this variety appeals to a range of creative expressions.
- Most mediums can be used in individual or group therapy settings and can be helpful for all ages and backgrounds. There are situations where specialized skills, knowledge and care is required and may not be suitable for some.
- After the artwork is complete, the practitioner may help the client explore the meaning and significance of the piece.
- Art therapy using painting involves the use of a variety of paints, such as watercolor, acrylic, oil, gouache, tempera, and pastel, to create images as a means of exploring and processing emotions, thoughts, and experiences
- Techniques may include free painting, guided visualization, and symbolism
- There are many different media that can be used in drawing, including pencil, charcoal, pastel, ink, pen, marker, graphite, conte, and chalk
- Some common techniques used in therapeutic drawing include free drawing, guided drawing, drawing to music, and using drawing as a form of self-reflection
- Sculpture is a medium in art therapy that involves creating three-dimensional objects or structures.
- Common media used in sculpture include clay, wire, paper, plaster.
- Techniques used in sculpture art therapy may include modeling, casting, and assemblage.
- The practitioner may guide the client through the process of creating a sculpture and may use techniques such as guided visualization or affirmations to help the client focus their mind and tap into their creativity.
- Collage is a method of creating an artwork by combining different materials onto a surface. There is no limit on what materials can be used in a collage. Some common materials include paper, fabric, photos, and found objects.
- Collage allows for the creation of complex and layered compositions, as multiple materials can be used to create depth and texture.
- Techniques that can be used when creating a collage include cut and paste, torn paper, and assemblage, amongst others
- Collage can be a spontaneous and intuitive process and is well-suited for therapeutic artistic expression.
Exercises – Painting in Art Therapy
Materials:
- Canvas or paper
- Acrylic, oil, or watercolor paints
- Paintbrushes
- Palette or paper plates for mixing paint
- Water cup
Exercise 1: Color exploration
- Set up a palette with a variety of paint colors.
- Spend some time exploring the different colors and mixing them to create new shades.
- As you work, consider what emotions or associations each color brings up for you.
- Use the colors to create an abstract (literally set your mind free) composition on the canvas or paper.
- How does your choice of colors reflect your preferences, likes, dislikes, moods?
- Can you discern a connection between your thoughts and feelings and what you have created?
Exercise 2: Painting with music:
- Choose a piece of music that has a strong emotional or personal meaning for you.
- As you listen to the music, use the paint and brushes to create a visual representation of the feelings and thoughts the music evokes.
- Allow the painting to be spontaneous and intuitive, rather than focusing on creating a specific image or representation.
- How does the music manifest through your artistic expression?
- Can you discern shapes, colors, brushstrokes that reflect the flow of music; melody, drama, passion…?
Exercises – Drawing in Art Therapy
Materials:
- Sheets of paper
- Drawing instrument (pen, pencil, marker)
Exercise 1: Drawing with your non-dominant hand:
- Sit in a comfortable position and take a few deep breaths to relax.
- Hold your drawing instrument in your non-dominant hand.
- Close your eyes and take a few deep breaths to clear your mind.
- When you feel ready, open your eyes and begin to draw whatever comes to mind. Don’t worry about making it perfect or about what it looks like. Just let your non-dominant hand guide the drawing.
- When you are finished, take a few moments to reflect on the experience. Did you find it challenging or freeing?
- How was it different from when you draw with your dominant hand?
Exercise 2: Drawing with your eyes closed:
- Sit in a comfortable position, close your eyes and take a few deep breaths to clear your mind and relax.
- Get your paper and pen ready for drawing.
- When you feel ready, begin to draw whatever comes to mind, keeping your eyes closed. Don’t worry about making it perfect or about what it looks like. Just let your hand guide the drawing.
- When you are finished, take a few moments to reflect on the experience. Did you feel a connection to the pen as you moved it around the page?
- How was it different from when you draw with your eyes open?
Exercises – Sculpting in Art Therapy
Materials:
- Clay or plasticine
- A few wire hangers. Different colors if you have them
- Sculpting tools other materials that can be used to shape clay and plasticine
- Wire cutters and pliers
- Gloves if needed
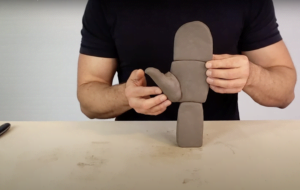
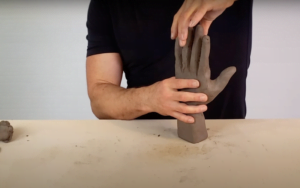
Exercise 1: Sculpting with clay
- Sit in a comfortable position and take a few deep breaths to relax.
- Begin to work with the clay, using your hands or the sculpting tools to shape it into whatever form you desire. There are no specific instructions or guidelines for this exercise – simply allow yourself to explore the clay and see what you can create.
- As you work, take a few moments to reflect on the experience.
- What feelings or thoughts come up for you as you sculpt?
- How does the clay feel in your hands?
- What shapes are you manifesting?
- How does the process of sculpting make you feel?
Exercise 2: Sculpting with wire
- You may use the wire cutters to cut open the hangers or you can begin the exercise with the hangers just as they are, cutting as you need.
- Use the pliers to bend and form the first hanger into a shape that will sit on the table.
- Add the other hangers and pieces of wire to the existing shape.
- Build as high or wide as you feel. You may fasten pieces of wire together in any way you would like.
- What does the final shape look like? Does it feel like art to you?
- How would you consider this to be a representation of your artistic expression?
Exercises – Collage in Art Therapy
Materials:
- Collect a variety of materials that represent different aspects of your identity, emotions, dreams and aspirations such as magazine clippings, photographs, and objects.
- Sheets of colored paper or white paper that you will paint as needed
- Sheets of thick paper or cardboard for the base of you collage
- Scissors, Glue and paints
Exercise 1: Collage of self:
- Prepare the cardboard by painting the entire thing in any way you would like. This is just to prepare the background for your work so don’t spend too much time on this.
- Select a few pieces of the materials you collected to begin your collage; don’t worry you can add more later.
- Begin placing the various items on the board in any way you wish. Use glue as needed. Cut and shape items as you feel.
- Try to select materials that create a positive resonance with you.
- When you are satisfied with your creation, sit back and consider what has manifested.
- Can you trace feelings, and themes and timelines and symbols and people and places… are you seeing glimpses of your life?
Exercise 2: Collage of dreams and aspirations
- Go through steps 1 to 5 above but this time select materials that reflect your interests and life goals and aspirations.
- What do you see? Is there a path? Can you discern growth, success, happiness?